
So you know your doorknob needs replacing or fixing. Maybe it’s loose, misaligned, or just doesn’t fit right. Now comes the real question: what does proper doorknob installation actually look like?
Here’s the step by step process that makes the difference between a doorknob that works perfectly and one that causes problems from day one
The Installation Process Step by Step
Measuring accurately comes first
Because standard doorknob holes are 2 1/8 inches, but not every door follows that standard. Measure your existing hole diameter and the backset, which is the distance from the door edge to the center of the hole. Get these wrong and your new hardware won’t fit, no matter how carefully you install it.
Removing old hardware cleanly
Prevents damage you’ll regret later. Screws come out in the right order. If they’re painted over or corroded, they need careful handling. Forcing stripped screws damages the door. The old latch pulls out from the door edge without tearing the wood. Any damage now makes the new installation harder.
Checking the door and holes
Reveals problems before you install new hardware. Stripped screw holes need filling. Damaged wood needs repair. The latch hole in the door edge might need cleaning or adjustment. Address these issues now or the new doorknob will have the same problems as the old one.
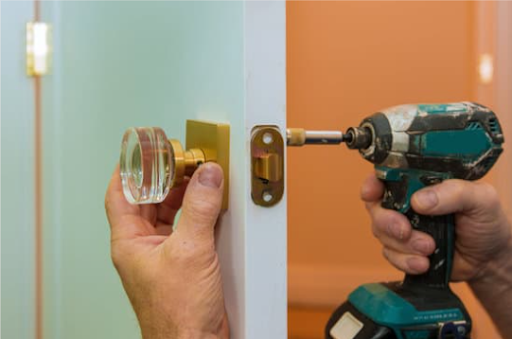
Installing the latch mechanism first
Sets up everything else. It goes into the door edge at the right depth so it sits flush. The direction matters because it has to catch the strike plate correctly. Get this wrong and nothing else will work no matter how perfect the rest of the installation looks.
Assembling the doorknob parts
Requires following the specific order for your hardware model. Interior and exterior handles thread together through the door. Screws go in hand tight first so everything aligns properly. Then you carefully tighten with a screwdriver, stopping when it’s snug but not forced. Too tight cracks the housing or strips threads. Too loose leaves wobbling hardware.
Aligning the strike plate
Makes or breaks the whole installation. The latch needs to slide smoothly into the strike plate hole when the door closes. If it’s off even slightly, the door won’t latch or you’ll have to force it. Sometimes the plate needs repositioning. Sometimes the hole needs adjusting. This final alignment is what makes the door feel effortless to use.
Testing everything thoroughly
Before calling it done catches problems while they’re still easy to fix. Turn the knob from both sides. Engage the lock multiple times. Close the door gently and see if it latches without forcing. Open it from the inside. Everything should feel smooth and natural.
Why Each Step Actually Matters
Skipping steps or doing them wrong creates the exact problems you’re trying to fix:
- Wrong measurements mean buying hardware twice and wasting time on returns
- Damaged removal creates holes that won’t hold screws properly anymore
- Poor alignment causes doors that won’t latch or knobs that bind when turning
- Over tightening cracks the mechanism while under tightening leaves it wobbly
In our next series, we’ll explore other home repairs that make your daily life easier and more comfortable.
Why Handyman Harry Gets the Details Right
You could spend your afternoon wrestling with doorknob installation, making trips to return wrong hardware, and hoping you got the alignment right. Or you could let someone who does this regularly handle it correctly the first time.
Handyman Harry knows the measurements, understands the alignment requirements, and has the experience to spot and solve problems before they become permanent. We bring the right tools and the expertise to install hardware that works perfectly from day one.
Ready for Doors That Work Effortlessly?
If you want doorknobs installed right, without the frustration of DIY troubleshooting, we’re here to help. You deserve doors that open, close, and latch the way they should.
Contact Handyman Harry today for professional doorknob installation. We’ll handle the details so everything works smoothly.