
You have all your tools and the new P-trap kit ready. You’ve cleared out under the sink. Now you’re looking at that tangle of pipes wondering where to start and how to make sure it doesn’t leak when you’re done.
Here’s the complete step by step process for installing a P-trap that works properly and doesn’t drip.
Step 1: Remove the Old P-Trap
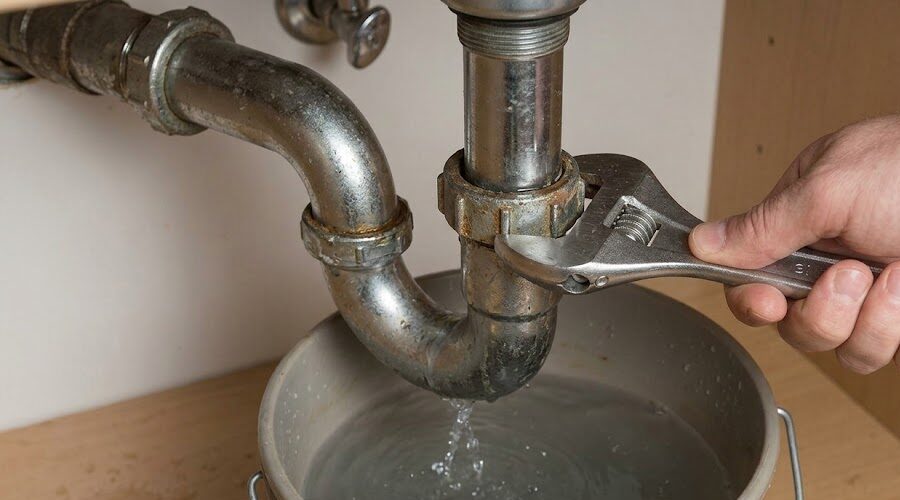
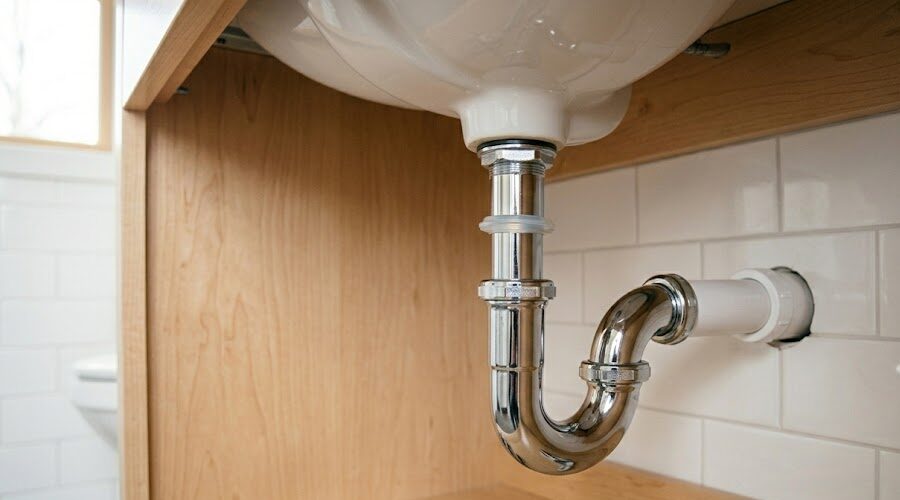
Place your bucket directly under the P-trap to catch water that will spill out. Every P-trap holds standing water, that’s what prevents sewer gas from coming up through your drain.
Loosen the slip nuts by hand first. Try turning them counterclockwise. If they won’t budge by hand, use your adjustable wrench or channel locks. Loosen the nut connecting to the tailpiece (coming from sink) first, then the nut connecting to the wall pipe.
Let water drain into your bucket. The P-trap will be full of water. Tilt it carefully to pour water into your bucket instead of all over the cabinet floor. Clean the pipe threads. Use a rag or wire brush to clean threads on the tailpiece and wall stub out. Old gunk, corrosion, or old washers stuck on threads cause leaks with new installations.
Step 2: Dry Fit Everything First
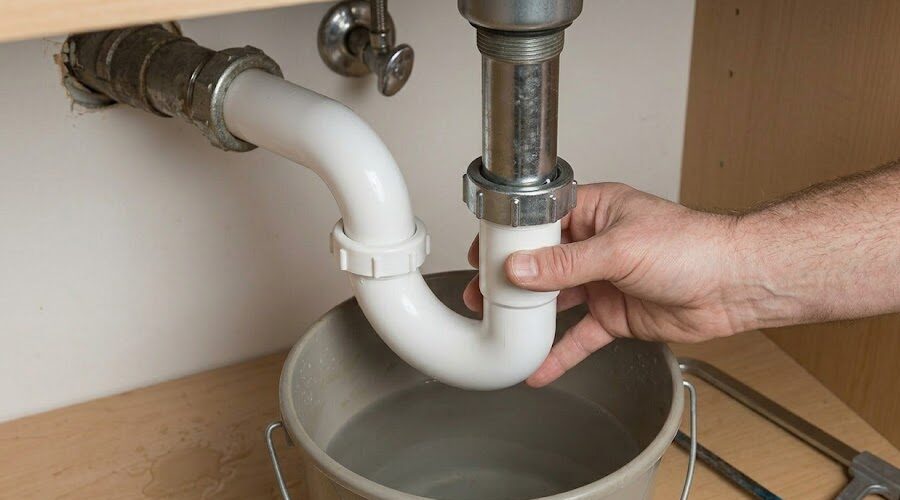
Assemble the new P-trap loosely without tightening anything. Connect the tailpiece to the sink drain, attach the trap bend, connect the trap arm to the wall pipe. Just hand tighten slip nuts enough to hold pieces together.
Check that everything lines up properly. The trap arm should slope slightly downward toward the wall (about 1/4 inch per foot). The trap bend should hang straight down. Nothing should be twisted or forced at angles.
Measure and adjust if needed. If pipes are too long, mark where to cut them. PVC cuts easily with a hacksaw. Make straight cuts, not angled ones. Sand rough edges smooth.
Step 3: Install Washers and Tighten Properly
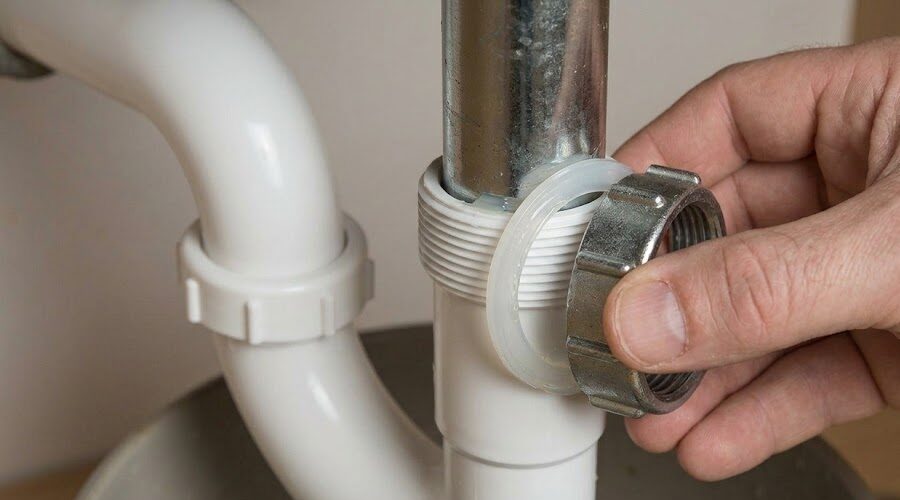
Put slip joint washers on correctly. The tapered side of the washer faces the nut, flat side faces the pipe. Wrong direction causes leaks no matter how tight you make it.
Apply plumber’s grease to rubber washers. A thin coat helps washers seal better and makes nuts easier to tighten and remove later.
Hand tighten all connections first. Thread nuts on by hand until snug. This ensures threads engage properly and nothing is cross threaded.
Use your wrench for final tightening. Give each nut about one quarter to one half turn past hand tight. PVC doesn’t need gorilla strength. Over tightening cracks plastic or crushes washers causing leaks.
Step 1: Remove the Old P-Trap

Turn on the water slowly. Let water run into the sink while watching under the cabinet. Look at every connection point for any drips or moisture.
Check connections by feel. Run your hand around each slip nut connection. Even small leaks will make your hand wet.
Tighten as needed. If you see drips, tighten that connection slightly more. Small adjustments usually fix minor leaks.
Get Your P-Trap Installed Without the Hassle
At Handyman Harry, we install and replace P-traps throughout Atlanta homes. We have the right tools, proper materials, and experience to handle installations that don’t leak and drain properly.
Stop worrying about leaks and improper drainage. Get your P-trap installed correctly by professionals who do plumbing work every day.
Contact Handyman Harry today at 404-482-1480 for P-trap installation and plumbing repairs. We’ll get it done right so your sink drains properly without leaks.