
You’ve found rot on the outside of your door frame. You know it needs fixing. But standing there with a can of wood filler from the hardware store isn’t going to solve this exterior wood rot problem, no matter what the label promises.
Here’s the complete repair process that actually stops exterior wood rot and rebuilds structural integrity to withstand weather, not just restore cosmetic appearance.
What You Actually Need for Exterior Wood Rot Repair
Essential materials: Epoxy wood consolidant, two part structural epoxy filler, wood preservative, oscillating multi tool or chisel, respirator and gloves, sandpaper (80, 120, 220 grit), and exterior grade primer and paint.
Budget $80 to $150 for proper exterior rated materials. Cheap alternatives or interior products fail within months when exposed to weather.
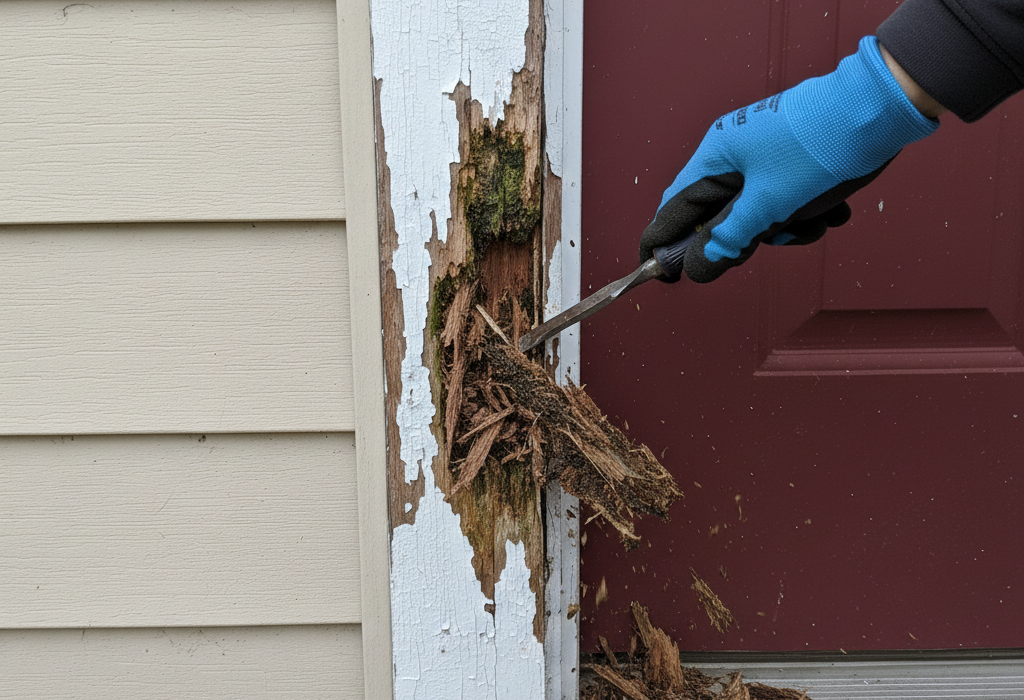
Step 1: Remove Every Bit of Exterior Rotted Wood
This is where most exterior repairs fail. People remove what looks bad from the outside and stop, leaving rotted wood deeper in the frame.
- Probe the entire area with your screwdriver working from the outside. Mark everywhere that feels soft.
- Cut out all compromised wood until you’re back to solid material. If the screwdriver sinks in even slightly, that wood needs to go.
- Create clean edges using a multi tool for precise cuts. Go deeper than the visible outside damage because rot from exterior moisture extends further into the frame.
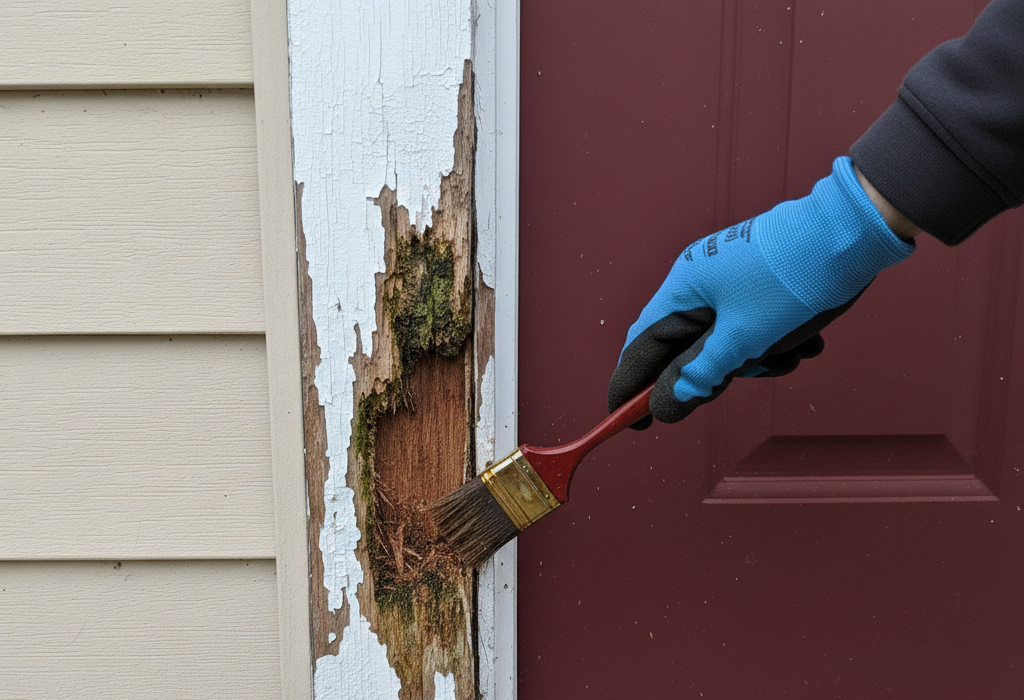
Step 2: Treat and Seal the Remaining Wood
- Brush away all dust from the cavity. Epoxy won’t bond to dusty surfaces.
- Apply wood preservative to all exposed wood surfaces. This kills remaining fungus and prevents future rot. Let it dry completely, usually several hours.
- Apply epoxy consolidant to the cut edges. This liquid hardens the wood fibers and creates a solid transition between old wood and new filler.
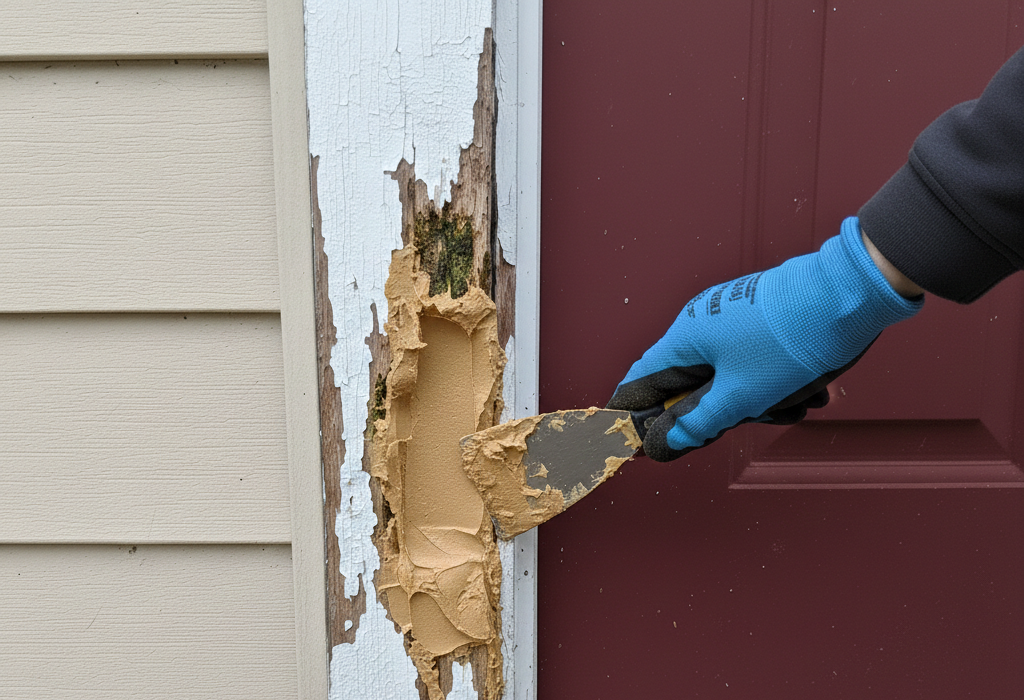
Step 3: Build Up with Structural Epoxy Filler
- Mix the epoxy thoroughly following exact ratio instructions. Wrong ratios mean it won’t cure properly.
- Apply in half inch layers for deep repairs, letting each cure before adding more.
- Overfill slightly beyond the surface level since you’ll sand it flush anyway.
- Shape while workable using a putty knife. You have 10 to 30 minutes before it hardens.
- Let it cure completely for 24 hours minimum before sanding.
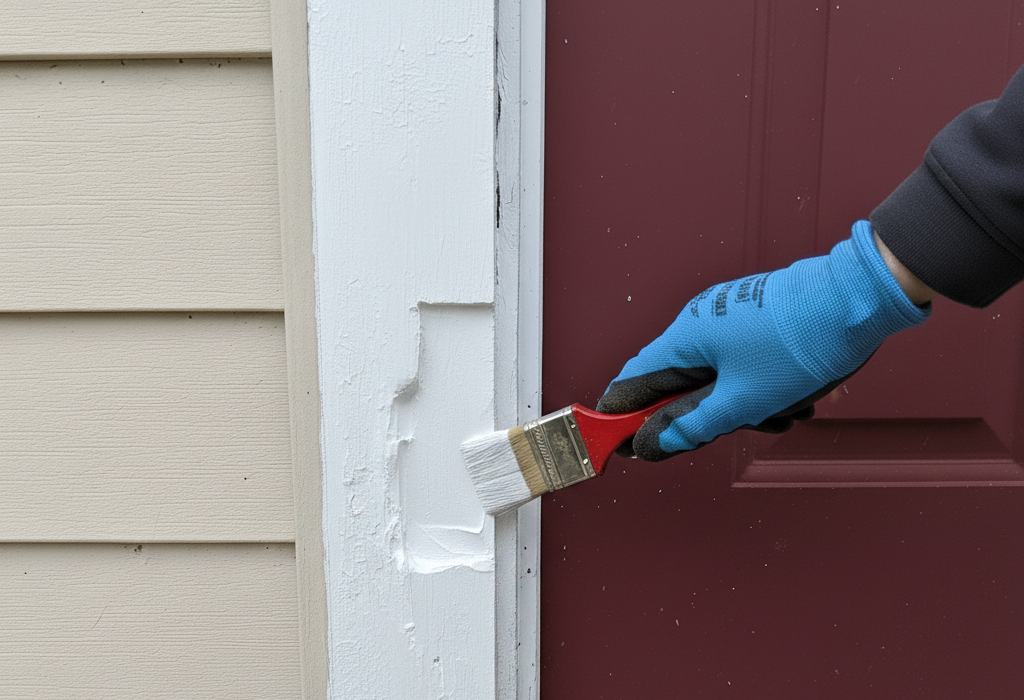
Step 4: Shape, Sand, and Seal
- Start with 80 grit sandpaper to shape the repair flush. Epoxy sands slowly, so be patient.
- Progress to 120 then 220 grit for smoothness.
- Prime immediately with exterior grade primer designed to bond to epoxy and withstand weather.
- Apply exterior paint in multiple thin coats using quality paint rated for your climate.

Step 5: Prevent Future Rot (Critical Exterior Protection)
- Replace exterior caulk where the frame meets siding, brick, or stucco. Old, cracked caulk is why water penetrates exterior frames.
- Ensure proper drainage away from the door. Clear gutters so they don’t overflow onto your frame.
- Inspect the drip cap above your door to ensure it directs water away.
- Keep landscaping away from direct contact with the frame.
- Repaint every 3 to 5 years to maintain protection.
Stop Exterior Wood Rot Before It Spreads Further
Exterior door frame rot only gets worse with time and weather exposure. Every rain, every season of humidity, every freeze thaw cycle on the outside spreads the damage deeper from the exterior into your home’s structure.
Don’t wait until exterior rot compromises your home’s security or spreads from outside through your walls. Get it repaired correctly now with materials and techniques designed for exterior weather exposure.
Contact Handyman Harry today for professional exterior door frame wood rot repair. We’ll stop the rot from outside, rebuild the structure, and protect against future weather damage.