
You’ve hired someone to replace your flooring. They said it’ll take two days. But what are they actually doing during those 48 hours? And how can you tell if they’re doing it right or cutting corners that’ll haunt you later?
Here’s the real timeline of professional flooring installation, including the steps cheap contractors skip and why those shortcuts create expensive problems.
Day 1
Hour 1-2: The Prep Work That Makes or Breaks Everything
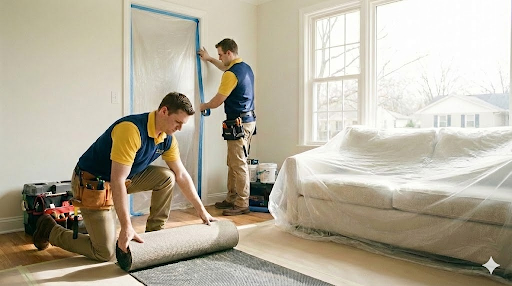
What’s happening: The crew arrives and immediately starts protecting your home. They’re laying down floor runners through hallways. Taping plastic over doorways to contain dust. Moving and wrapping furniture. Setting up ventilation.
What you should see: Systematic protection, not just throwing down a tarp. They should ask where you want furniture moved. They’re labeling and removing baseboards carefully, not prying them off carelessly.
Red flag: Contractors who skip straight to demolition without protecting your home. You’ll find dust everywhere for weeks.
Hour 6-8: The Critical Subfloor Inspection
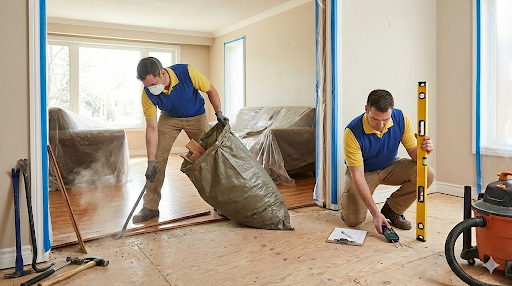
What’s happening: With old flooring gone, they’re examining every inch of subfloor. Checking for damage, soft spots, unevenness, squeaks. Testing with levels and moisture meters.
What you should see: The contractor walking the entire floor, using a long level in multiple directions, making notes about problem areas, discussing needed repairs with you before proceeding.
Red flag: If they just glance and say “looks good,” they’re not actually inspecting. Problems will show up after installation when it’s too late.

Hour 8-10: Subfloor Repairs and Leveling
What’s happening: Fixing everything found during inspection. Replacing damaged sections. Applying leveling compound to low spots. Sanding high spots. Securing squeaky areas. Treating moisture issues.
What you should see: Appropriate fixes for identified problems. Leveling compound drying properly before proceeding. No rushing through this step.
How to verify: Ask them to walk you through what they found and how they’re fixing it. Good contractors explain, bad ones get defensive.
Day 2
Hour 1-3: Material Acclimation Check and Layout
What’s happening: Verifying materials have acclimated to your home’s temperature and humidity (they should have delivered materials at least 48 hours before installation for this). Planning the layout to minimize waste and ensure patterns look intentional.
What you should see: Materials that have been sitting in your home already, not brought from a truck that morning. Chalk lines or layout marks showing they’ve planned the installation pattern.
Red flag: Installing materials fresh from a truck. This causes expansion and contraction issues later.
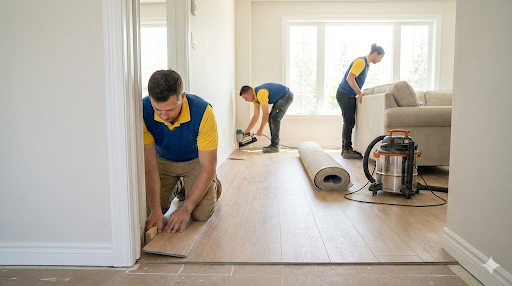
Hour 3-8: The Actual Installation
What’s happening: New flooring going down following proper techniques for that specific material. This involves precise cutting, fitting, spacing, and securing according to manufacturer specifications.
What you should see:
- Consistent spacing along walls (usually quarter inch for expansion)
- Staggered seams in plank flooring (not all lined up)
- Clean, precise cuts around obstacles
- Proper use of adhesives, nails, or clicking systems
- No forcing pieces that don’t fit easily
Red flag: Uneven gaps, aligned seams creating visible lines, rough cuts, or excessive hammering to force pieces together.
Hour 8-10: Transitions, Trim, and Final Details
What’s happening: Installing transition strips between rooms and flooring types. Reinstalling or installing new baseboards. Adding quarter round if needed. Final inspection and touch ups.
What you should see: Smooth, secure transitions that don’t wobble. Trim that’s level and properly secured. Clean cuts where flooring meets door frames. No visible gaps or rough edges.
Hour 10-12: The Cleanup You'll Actually Notice
What’s happening: Thorough cleaning of the workspace and surrounding areas. Removing all protection materials. Vacuuming dust. Returning furniture carefully.
What you should see: Your home looking cleaner than before they started (except for the new flooring). All debris gone. Protection removed systematically. Furniture placed back where you want it.
Red flag: Leaving debris, dust throughout your home, or damage to walls from moving furniture.
Get It Done Right From the Start
At Handyman Harry, we follow proper installation procedures every single time. We protect your home thoroughly, inspect and repair subfloors properly, install according to manufacturer specifications, and clean up completely. You get flooring that looks professional and lasts decades because we do every step the way it’s supposed to be done.
Contact Handyman Harry today for professional flooring replacement done right. We’ll walk you through exactly what to expect and deliver results that last.