

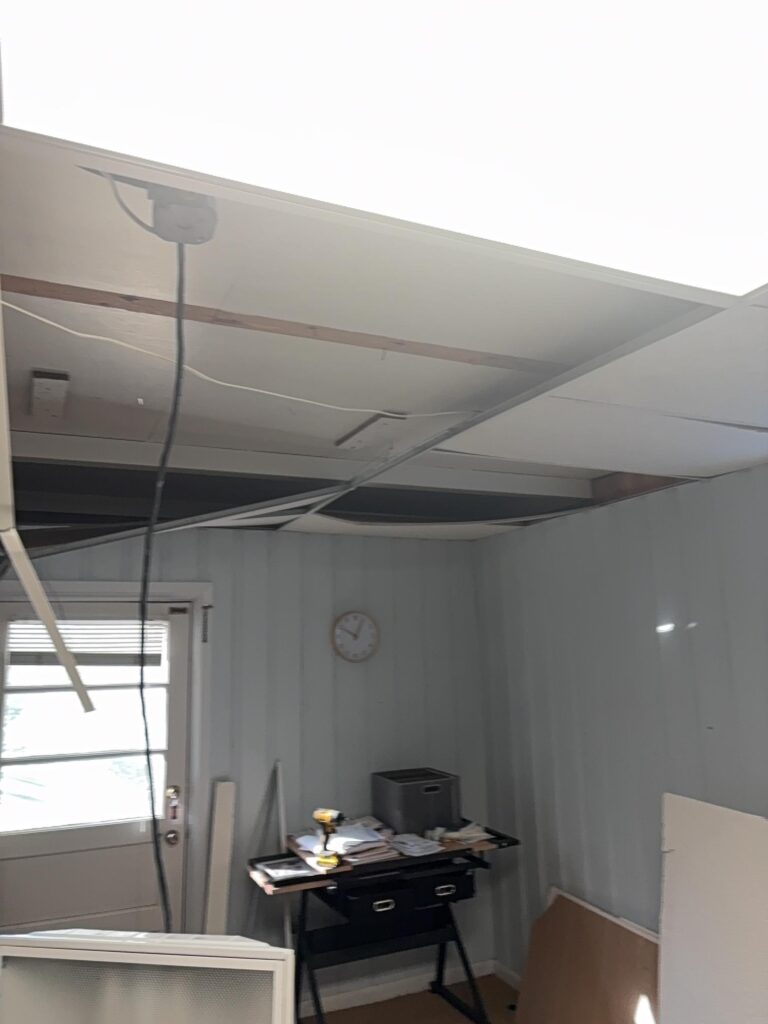
Your dropped ceiling looks terrible with stained tiles, sagging sections, or missing pieces. You want it fixed so your space looks clean and professional again. But you’re not sure what the repair process involves or how long it takes.
Here’s exactly what happens during professional dropped ceiling repair from start to finish.
Step 1: Inspection and Assessment
Examining the entire ceiling system to find all damage. Professionals don’t just look at obvious problems. They check every grid section, inspect all tiles, and test grid stability. Hidden damage often exists beyond what you see from the ground.
Identifying the cause of damage is critical. If water caused the damage, where did it come from? Is the leak fixed? If the grid is sagging, why? Without addressing root causes, repairs fail quickly.
Measuring the space to calculate exactly how many tiles and grid pieces are needed. Ordering the right amount prevents delays from running out of materials or wasting money on excess.
Checking what’s above the ceiling for any issues that need addressing before repair. Loose wires, leaking pipes, or damaged insulation can complicate repairs.
Step 2: Removing Damaged Materials
Taking out stained or broken tiles carefully to avoid damaging surrounding good tiles. Tiles lift straight up and tilt to come out of the grid. Rushing this step breaks more tiles unnecessarily.
Removing damaged grid sections requires disconnecting them from suspension wires and neighboring grid pieces. Bent or rusted grid pieces can’t be straightened effectively and need complete replacement.
Disposing of old materials properly keeps the work area clean and safe. Broken tiles create dust and debris that must be contained and removed.
Protecting the space below with drop cloths if needed. Dust and small debris fall during removal. Covering furniture, equipment, or floors prevents mess.
Step 3: Installing New Grid Framework
Leveling the new grid properly is the most important step. The grid must be perfectly level or tiles won’t sit flat and the ceiling looks wavy. Professionals use long levels and laser levels to ensure accuracy.
Connecting new grid pieces to existing sections seamlessly. New and old grid must align perfectly at the same height. Misalignment creates visible lines and uneven tile placement.
Securing suspension wires correctly at proper spacing. Wires hang from the structure above and hold the grid at the right height. Too few wires or improperly spaced wires cause sagging.
Ensuring grid is square and straight so tiles fit properly without gaps or forcing. The grid creates a precise pattern that tiles must fit into cleanly.
Step 4: Installing New Ceiling Tiles
Matching tile style and quality to your needs. Standard tiles work for back areas. Better quality tiles suit visible professional spaces. Tiles come in smooth, textured, and patterned designs.
Placing tiles carefully into the grid openings. Tiles lift up, tilt to fit through the opening, then lower into place on the grid framework. Proper technique prevents breaking edges.
Ensuring all tiles sit evenly and flush with the grid. Tiles should rest on the grid without gaps, tilting, or sagging. Uneven tiles look unprofessional.
Cleaning tiles before final inspection removes fingerprints and dust from handling. New tiles should look pristine when the job is complete.
Step 5: Final Check and Cleanup
Inspecting every tile and grid section for proper installation. Looking from different angles reveals issues not visible from directly below.
Adjusting any tiles that aren’t sitting correctly before leaving. Small adjustments now prevent callbacks later.
Complete cleanup of all debris, old materials, and packaging. The space should look better than before work started, with no mess left behind.
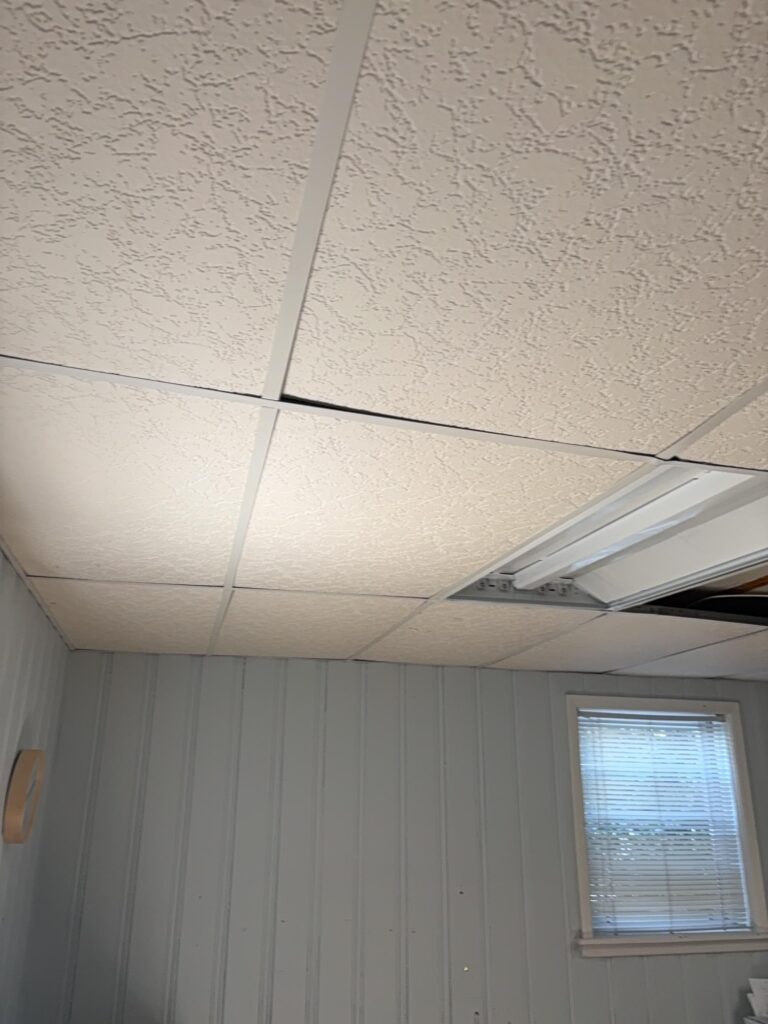
A Handyman Before vs After
Get Your Dropped Ceiling
Repaired Right
At Handyman Harry, we repair dropped ceilings in offices, basements, and commercial spaces throughout Atlanta. We assess damage properly, install new grid and tiles correctly, and ensure everything looks professional and level.
Contact Handyman Harry today at 404-482-1480 for dropped ceiling repair and installation. We’ll restore your ceiling to like new condition.